Procedural Film Scratch
One of the common (or cliche) effects in the post production phase to achieve the look of vintage film that are either worn out, exposed in a very dusty environment… or maybe for horror/spooky mood.
BUT for no actual reason (hehe), we will be creating a procedural system that can generate the scratches that has controllable parameters like translate, rotate, scale, animation speed, flickering and the amount of scratches!
This will be a three parts tutorials and for the first part, I’ll be covering the process of creating and testing a simple gizmo. Basic knowledge of Nuke are expected but not necessary although why are you visiting this website if not for the Nuke tutorials? ;D
What’s a Gizmo?
Gizmo in Nuke is a node or more accurately, a group that consists of a collection of nodes that are customised to serve a purpose in a pipeline.
Examples: Burn-in WIP dailies, glow effects from specific render matte passes, glitchy macro-blocking artifact effects and etc.
The advantage of gizmo is that the functionalities are self contained provided it is using the default nodes in Nuke so it can be reuse on other workstations provided it is compatible with the Nuke version (this is where the author need to ensure the gizmo are compatible by asking their colleagues or online samaritan for testing).
Here’s some useful links to get an idea about gizmo:
http://www.nukepedia.com/ (a great collection of gizmos although you need to register to download it)
http://www.nukepedia.com/written-tutorials/expressions-101
http://www.cameroncarson.com/nuke-wave-expressions/
http://www.digitalgypsy.com/vfxlog/archives/2007/10/tip-of-the-week-making-a-nuke.php (it’s over 10 years old(!) but a great tutorial which are applicable to the current Nuke release)
Creating the Gizmo Template
Throw in a bunch of nodes and CTRL+G to create the gizmo!
…
Ok technically it is correct but not the correct way to learn especially if you want to create a usable gizmo.
Steps by Steps
We’ll be creating a simple gizmo that fully desaturates the image and adds a vignette which are configurable.
The following steps will occasionally omits certain details like click this/that and screenshots since I find it redundant. Just pay attention when reading it again if you’re troubleshooting the steps!
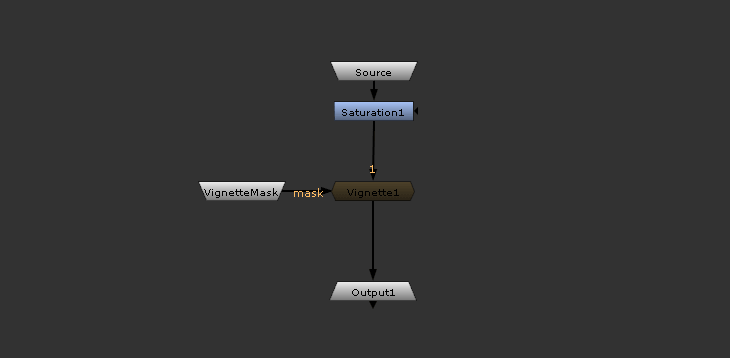
- Add a Saturation and Vignette (which is a Gizmo itself!) node.
- Select both of them and CTRL+G to create the Gizmo. Rename it as tkk_ClassicProjectorLook (or whatever you like as tkk is a shortname for taukeke which act as a namespace for the gizmo in a typical studio pipeline).
- Rename Input1 as Source and Input2 as VignetteMask. This will update the label of the input arrows of the gizmo. Refer to the following screenshot to get an idea.
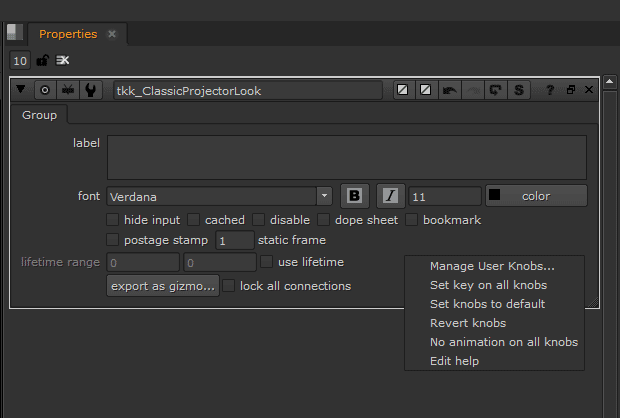
- Right-click on an empty space in the tkk_ClassicProjectorLook properties panel and choose Manage User Knobs.
- Depending on the situation, it might show up empty or it will have a User value in the list. For the sake of this tutorial, let’s proceed as though it is empty.
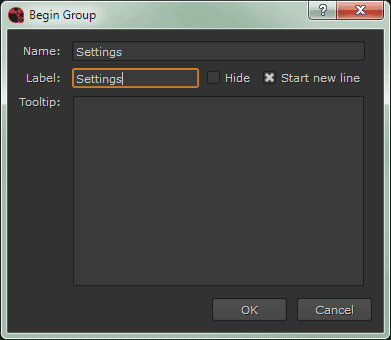
- Click Add and choose Group from the dropdown list.

- Rename both Name and Label as Settings.
- Uh oh, suddenly there is a User and endGroup in the list besides Settings. This is not desirable as seen in the Properties screenshot below so delete both Settings and endGroup.
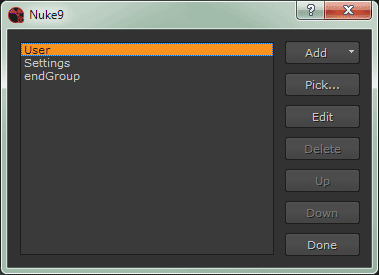

- Select User and click on Edit. Rename it as Settings.
- Add a Check Box and fill in both Name and Label as Grayscale.
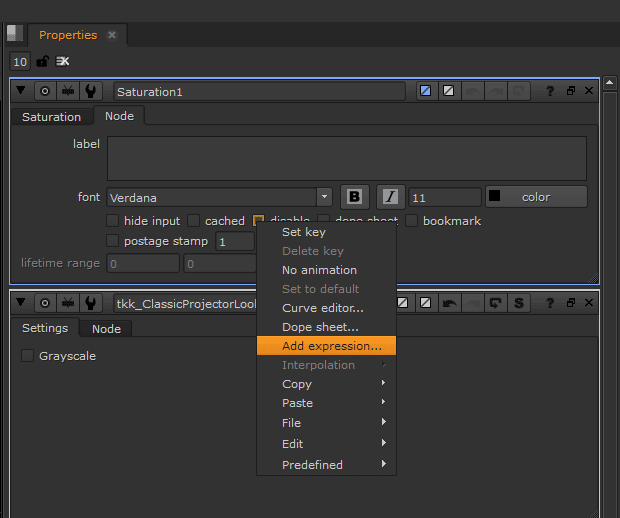
- Open the Saturation1 properties and make sure the saturation value is set to 0 (duh) to fully desaturate.
- Go to the Node tab of Saturation1 and right click on disable checkbox. Choose Add expression… from the dropdown list.
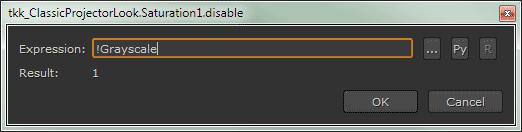
- You can use either !Grayscale or Grayscale == 0 in the Expression field.
.
Here’s how it works: Remember the Grayscale checkbox that we created earlier? Since a checkbox is a boolean aka true or false that returns 1 or 0 respectively, the expression is telling Nuke that if Grayscale == 0 (aka unchecked), the disable checkbox are enabled (true).
.
This means the Saturation1 node is disable. So if a user checked Grayscale which returns true, the Saturation1 node are no longer disabled since the Grayscale == 0 expression doesn’t match the new value. The !Grayscale is just another way of writing Grayscale == 0 to achieve the same result.
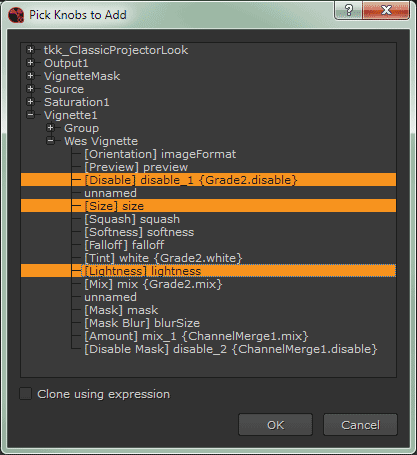
. - Instead of Add, we going to choose Pick… Pick the following knobs from the screenshot below.
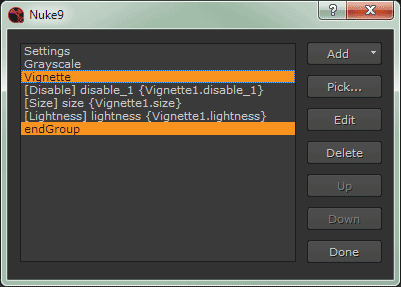
- Add a Group and rename it as Vignette. Rearrange it to match the the screenshot below. Basically any knobs in between them belongs to the Vignette group that are collapsible in the Properties panel.
- Tada! We’re pretty much done so now we need to test the gizmo…
Testing the Gizmo
Use any valid image as the Source and a roto shape for the VignetteMask.
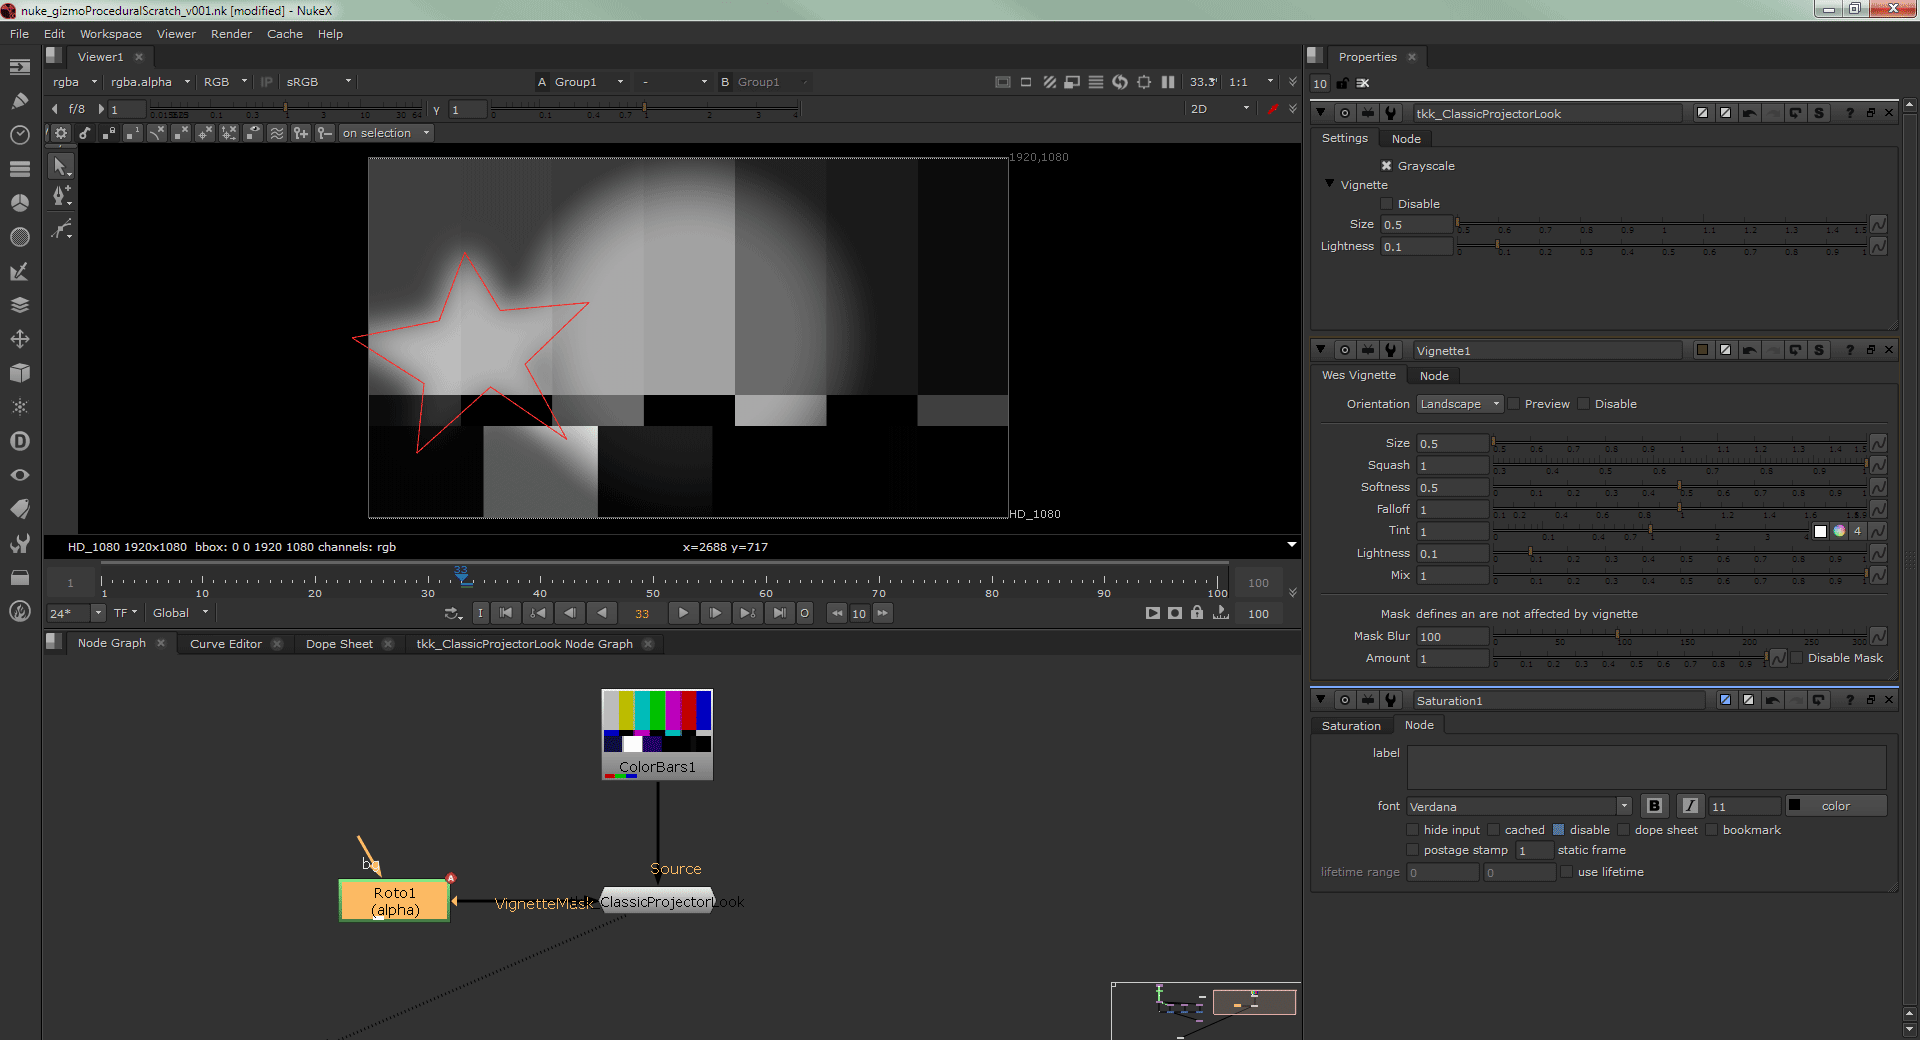
Proceed to fool around with the various settings that we setup for the gizmo to see if it works. All should be well and if it doesn’t work… back to troubleshooting the gizmo or redo the whole things from scratch!
Things to note:
- Usually it is best to have both Name and Label to share the same naming. Remember only alphanumeric and underscore!
- Don’t use spaces for the gizmo node name. Well Nuke will replace it as underscore but I usually prefer to use camelCase naming like NuclearGlow, RainingCatsDogs, InstantRich, etc.
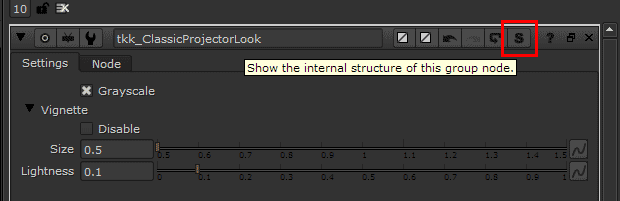
- To edit the gizmo, just click on the S button on the properties panel as highlighted in the screenshot below.
Next on Creating Gizmo Part 2…
Now that we manage to get a functioning gizmo that does absolutely nothing of value (heh), I’ll be covering the following topics in the next part:
- Drawing roto shapes for the scratch mark.
- Duplicate roto shapes using multiple transform expression and merge.
- Animating the roto shapes with expression.
- Using Noise to generate the dust speckles.
In conclusion, we learn the concept of creating a gizmo, adding custom user knobs and using expression to drive/link the knobs with the relevant parameters.
This will give you the foundation to iterate it to achieve the gizmo that are required by the production pipeline or accelerate tedious workflow that reuses dozens of nodes into a user friendly UI!

