Tweak HDRI Map and Where to Find Them!
This Nuke/insertprogramthatcaneditHDRI Tips will be a rather short tutorial that focuses on how to tweak HDRI map in Nuke for use in rendering.
I’m using Vray but any renderer that supports IBL (image-based lighting) should work too like Octane, Corona, Arnold and etc.
No idea if UE4 (Unreal Engine 4) own IBL system behaves similarly but let me know in the comment (if I haven’t update this article in the near future)!
Last edited: [last-modified] Added HDRI Haven link as another free HDRI resources.
The Chosen HDRI as Case Study
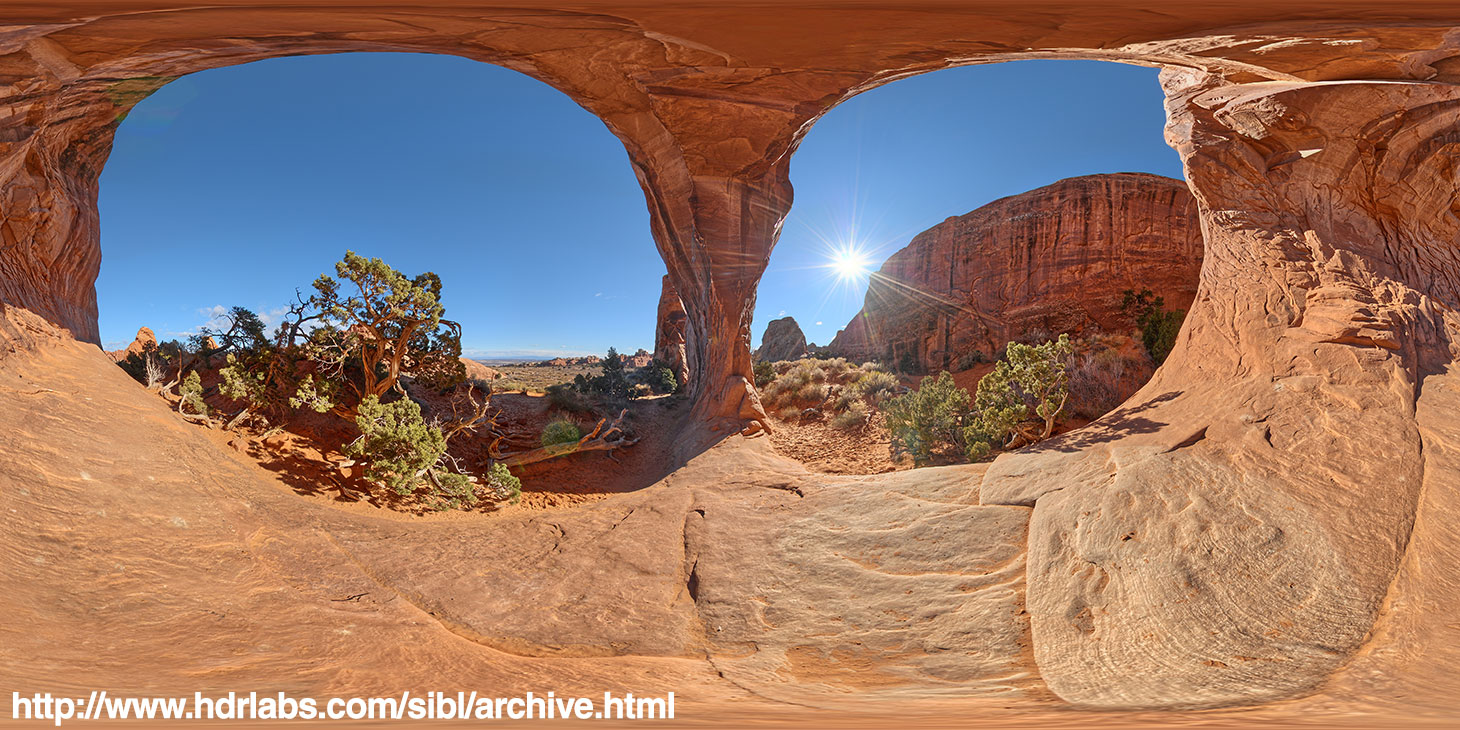
First let us see the overall HDRI (and don’t forget to visit their website for dozens of free high quality HDRI).
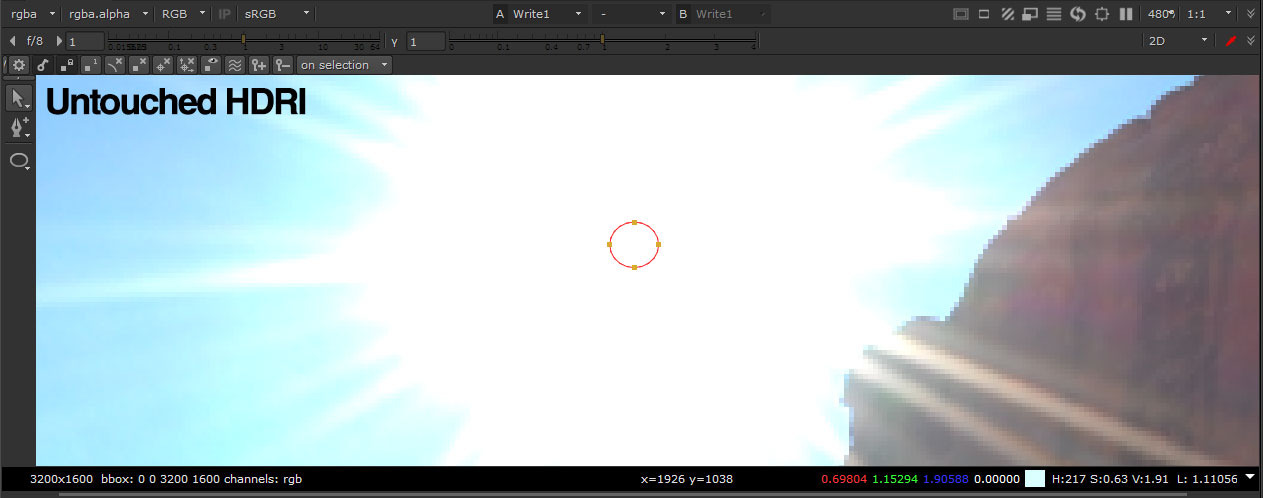
Remember this is low dynamic range JPEG so don’t ever think of using it as IBL!
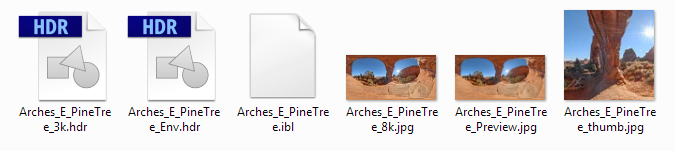
This is what you’ll usually get (it varies) after unzipping one of the HDRI archives.
sIBL Archives has a great selection of free HDRIs and I chose this one for this tutorial since it has a nice bright and harsh sunlight that cast a long shadows which will be our clue when tweaking it.
Also HDRI Haven is another awesome website that are completely free which I recommend too! (although the quality is too good that you don’t need to tweak it which defeat the purpose of this tutorial–)
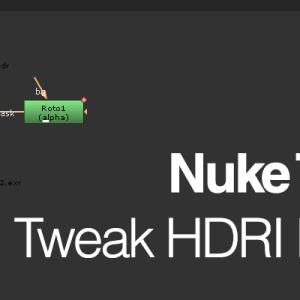
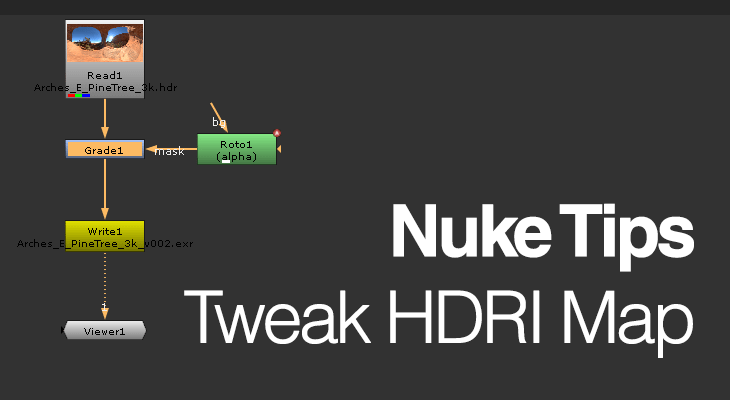
You don’t need any special node setup in Nuke. Just a grade node with roto for masking is all you need!
The Subject Matter…
I found this free great skull model which you can get it from here: https://free3d.com/3d-model/accurate-human-skull-wip-35571.html
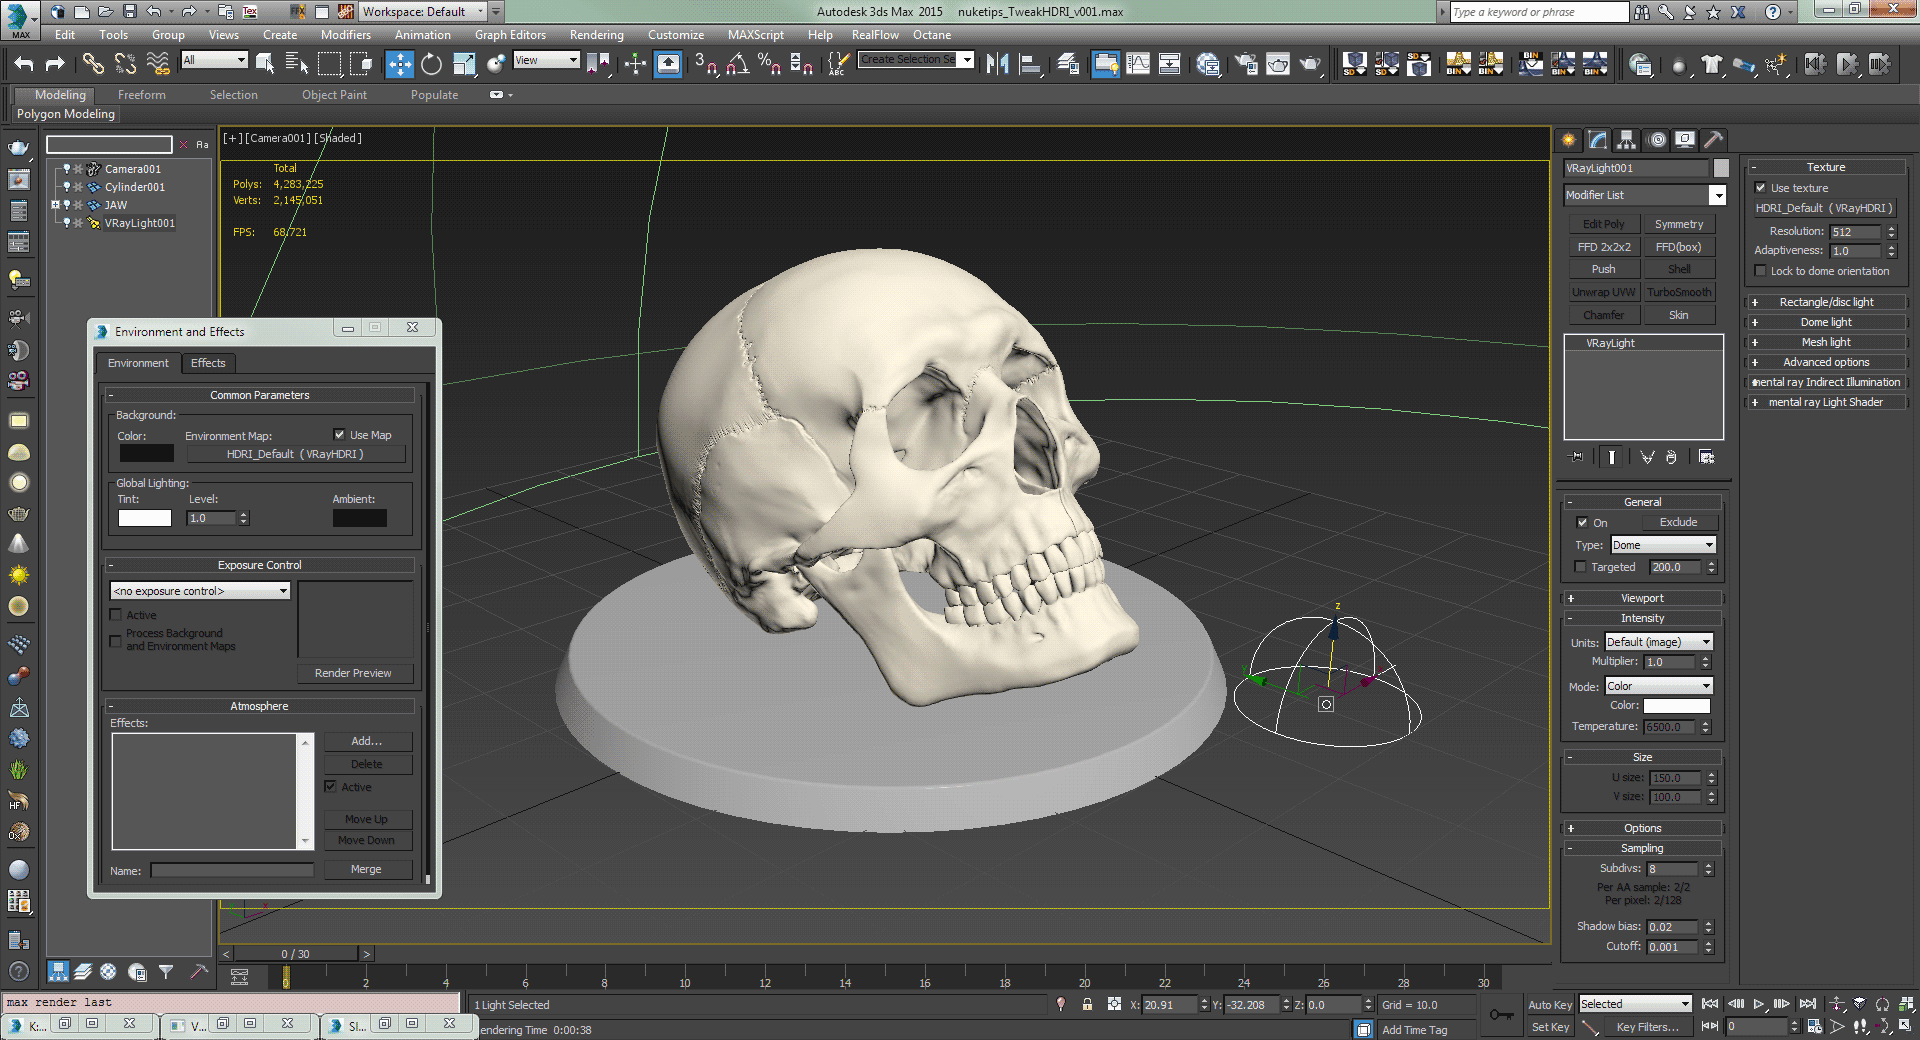
Nothing fancy with the setup.
As before, I’ll not explain the steps to setup the lighting in 3ds Max… but the screenshot should give you a good idea if you want to recreate it.
How to Tweak HDRI Map in Nuke
Now let us see what’s happening in Nuke with the HDRI file.
The HDRI resolution is 3200×1600 and currently the viewer zoom is set to 480%. Everything is at default except for the circle roto shape.
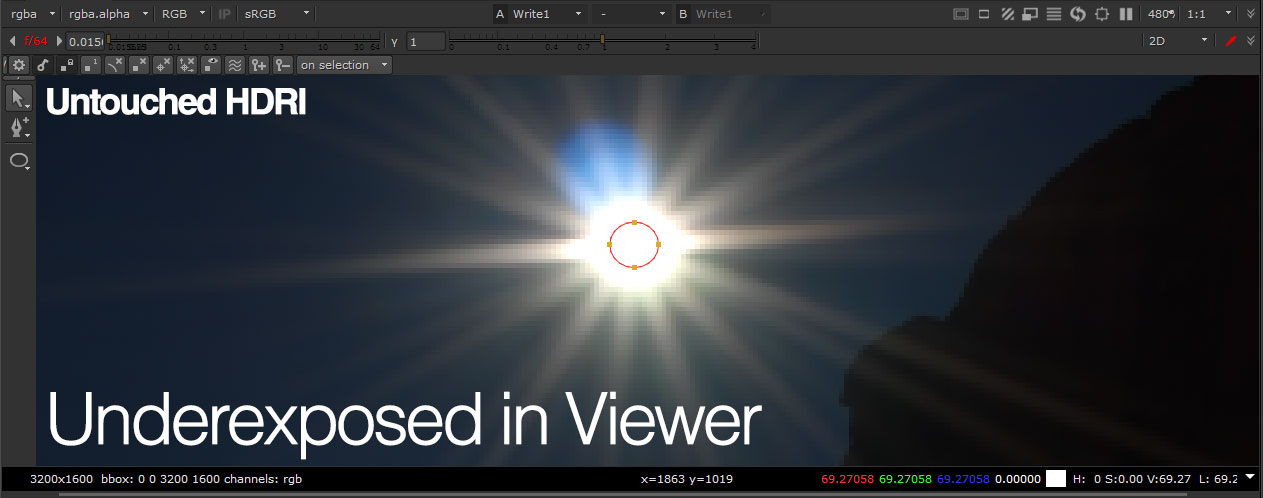
By underexposing the gain slider on the upper left of the viewer all the way to the absolute minimum (f/64), we can see the HDRI has a great deal of information unlike the burn out overexposed in the prior screenshot.
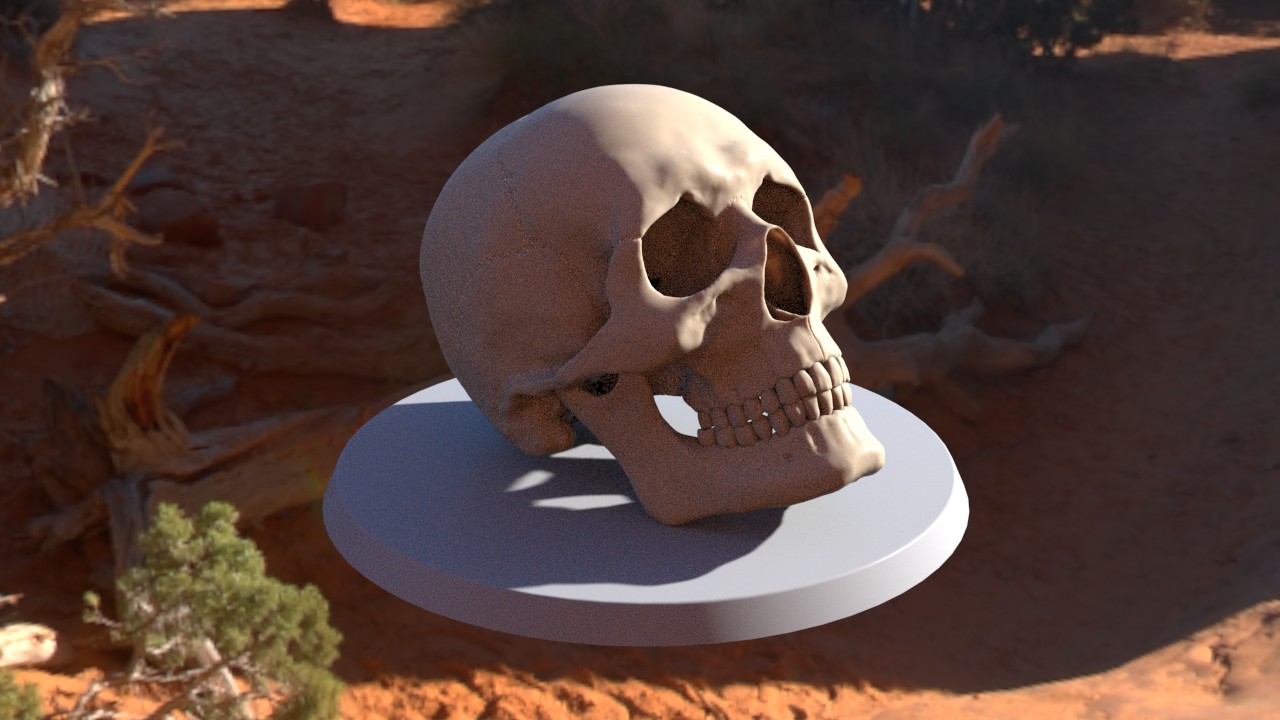
The problem here is the value in the sun spot.
At around 69.27, it is still mighty bright in the viewer but not sufficient to recreate the harsh lighting in Vray as seen in the following render.
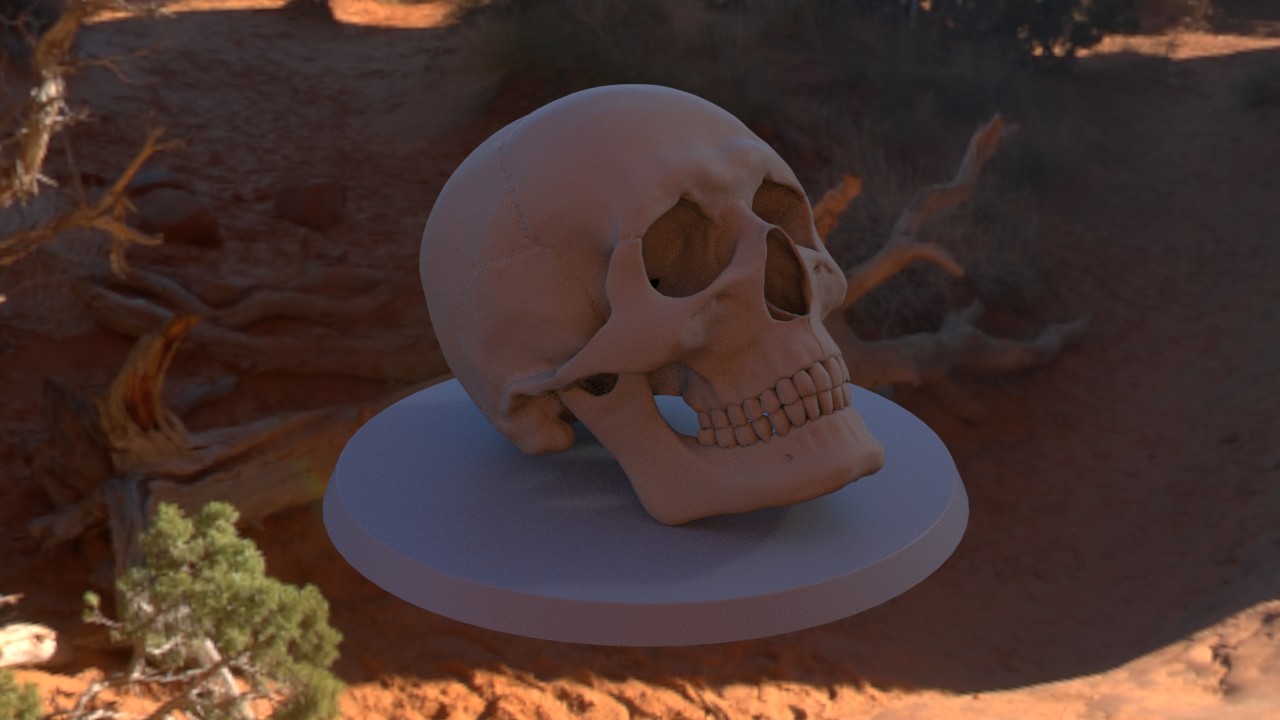
The skull looks like it is under a canopy. Observed the shadowing below the skull against the shadows in the HDRI environment.
This will be our clue to trial and error in the following steps.
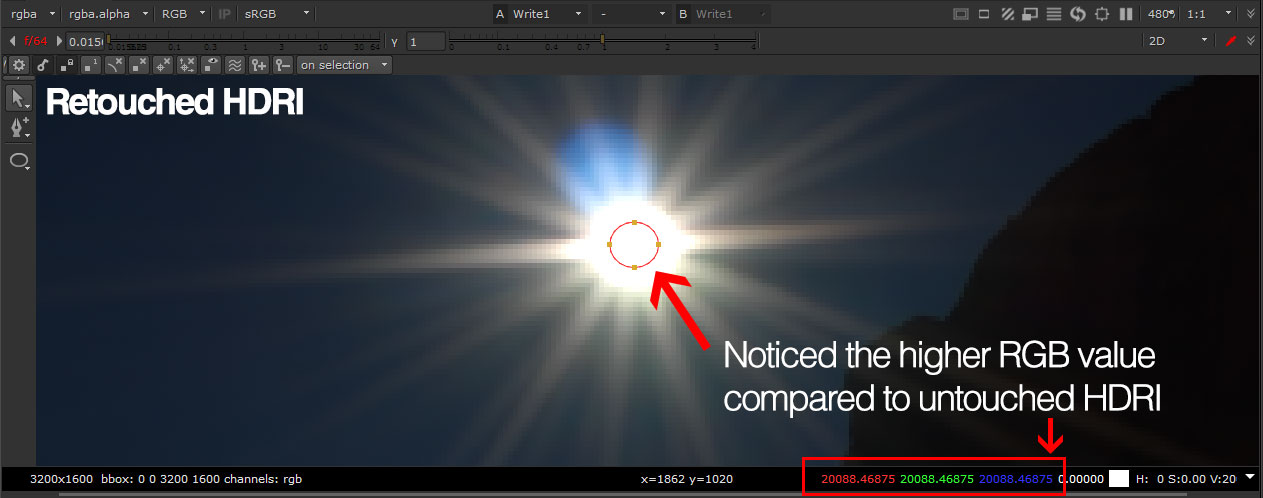
Using the Grade node with the roto shape as the mask, I bump up the Multiplier value until the RGB value reaches around 20,000… ok it looks like there is no changes from the previous screenshot.
Fret not as extreme underexposing the viewer shows us the very bright spot.
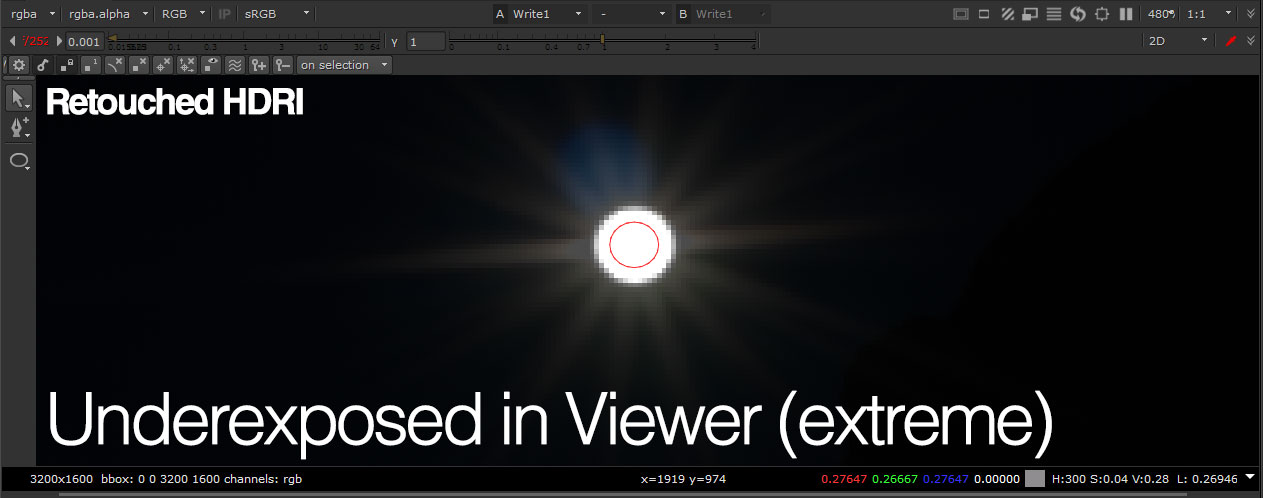
This is approximate 290 times the original peak value of 69.27! Surely this will create a nuclear lighting in the final render?
The Final Result
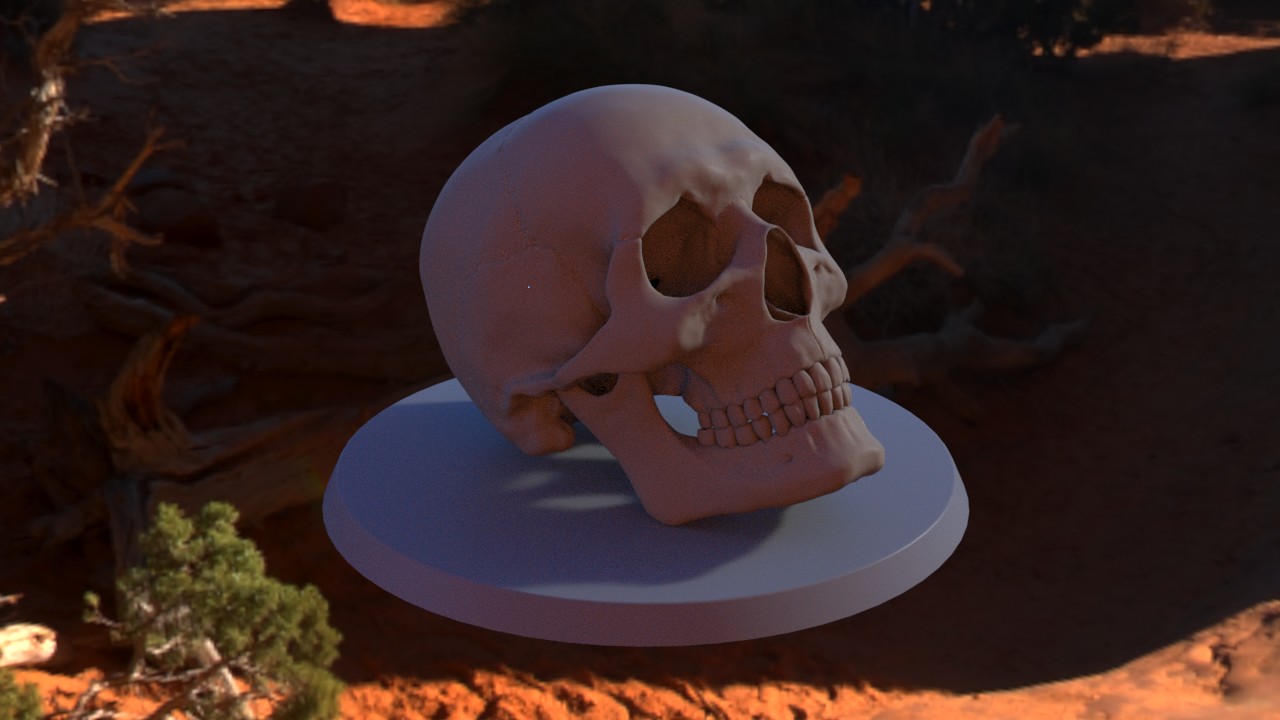
Using the methods above yields us a much more convincing lighting (and look at that hard shadows matching nicely with the shadows in the HDRI environment!).
For comparison, I’ll put the untouched HDRI and a gamma tweak version of it that other tutorials might recommend… which I discouraged unless you’re in a hurry.
^Lit using untouched HDRI.
^Lit using untouched HDRI with a gamma tweak of 0.7 through Vray HDRI map. While it does produce a harder shadows, the lighting still looks flat and the environment looks darker.
Further Reading
https://vrayschool.com/perfect-hdri-lighting-3ds-max-vray/
https://docs.chaosgroup.com/display/VRAY3MAX/Dome+Light+%7C+VRayLight
https://support.solidangle.com/display/AFMUG/Image+Based+Lighting
http://rag3dviz.com/tutorial/hdri-lighting-in-unreal-engine/
https://www.fxguide.com/featured/the-state-of-rendering/#IBL

