A quick guide to prepping your Maya scene to Vray Scene (.vrscene)
Last edited for clarity: [last-modified]
So lately (truth be told, since August 2015) I’ve been struggling with the lack of RAM for my current project at work which are the root of frequent render crashing and the reduced productivity of not being able to multitask as there is insufficient RAM when rendering using Vray in Maya.
For my current project as of this writing, we are encouraged to use Vray 3.10 (the latest version) while most of my project working files are using Vray 3.00.
I can safely confirm that there is no issue when exporting a Vray 3.10 .vrscene and rendering using Vray 3.00 from my test. Although it is safer to stick to the same version that you use when exporting your vrscene.
WARNING: Make sure all your materials and light in the scene are Vray compatible!
That means Vray Materials and Vray Lights and no custom procedural textures, standard Maya shader (Lambert and friends) and Maya lights. Standard Maya Camera are fine.
Steps by steps, it’s not so easy… for the first time.
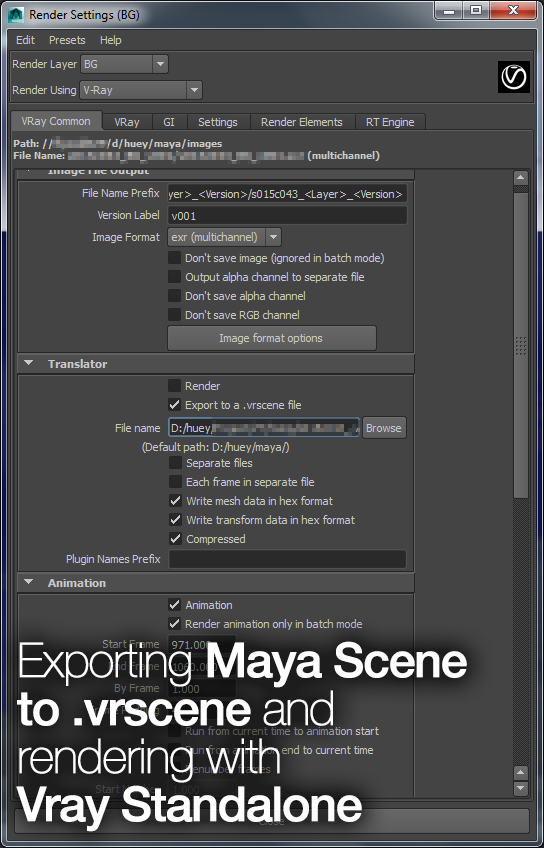
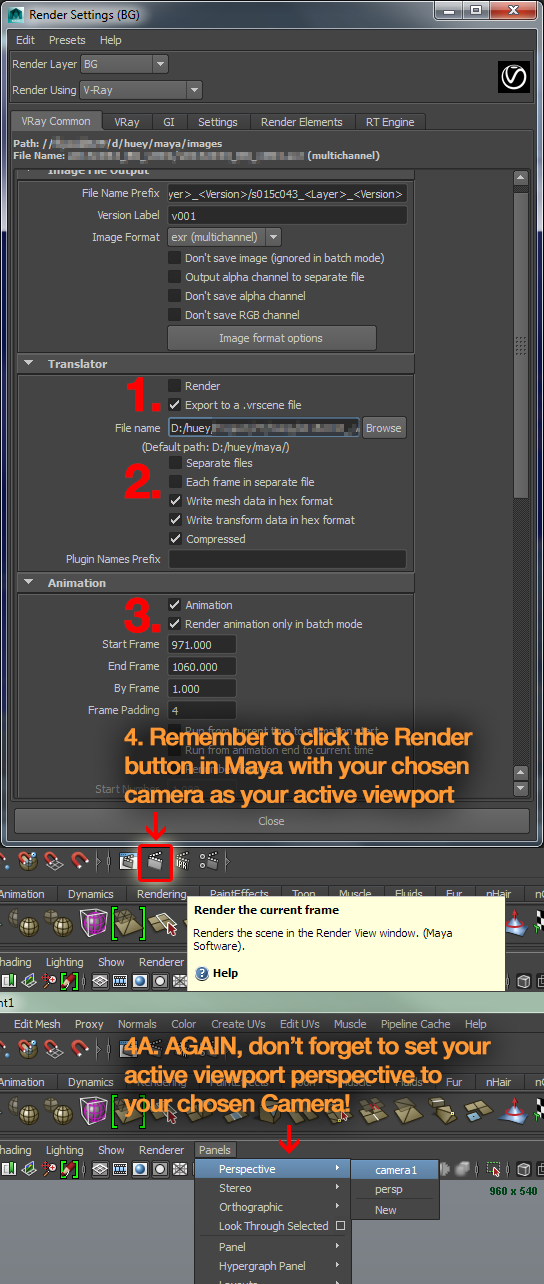
- Make sure the Render checkbox is TURN OFF and enable Export to a .vrscene file. Set your path and filename for the .vrscene.
- Follow my settings above for a fuss free rendering.
- Enable the Animation checkbox if you want to render in sequence. I’m unsure if Render animation only in batch mode are needed but I check it anyway.
- Followed the instructions in the screenshot above.
- Lastly, setup your usual Vray configuration (subdivs, Adaptive/Adaptive Subdivision, Embree, Render Elements, etc) and click Render.
Just wait as Maya translate all the necessary geometry/shaders/lights/textures into .vrscene and the Vray VFB (Virtual Frame Buffer) window will pop up indicating the whole process has completed.
Rendering the .vrscene with Vray Standalone through command prompt
I’ll spare you the details on how to use the Vray Standalone as Chaos Group has a great documentation on it (that is sadly not friendly for complete beginner).
Take note my steps are specific to Windows so OSX/Linux users will have to google around on running Vray standalone on your plaftorm.
Locate your Vray standalone shortcut (e.g. Go to Start Menu->All Programs->Chaos Group->V-Ray Adv for [insert typical software name and year/version]->Tools->V-Ray Standalone command prompt) or use the command prompt and navigate to the directory which contains vray.exe.
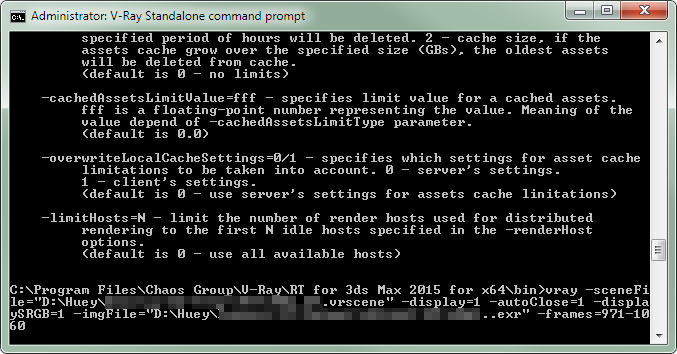
To save you the time and trouble, you can use the following command that I already setup to since I configure it to work similarly like how one render with Vray in Maya.
vray -sceneFile="D:\Huey\Project\taukeke\Temp\s015c043_BG.vrscene" -display=1 -autoClose=1 -displaySRGB=1 -imgFile="D:\Huey\Project\taukeke\Output\s015043_BG_v001..exr" -frames=971-1060
Just replace the sceneFile with your .vrscene and imgFile with the name of the files and format. In my example, having a “.” before the extension will be the place for the frame number.
Preferably, do remember your animation range as you need to tell Vray Standalone the frame range that you want to render as it will only render the very first animation frame that you specified in Maya. I got no idea why this happened but better safe than sorry.
I think you can use UNC path although I haven’t try it.
Example of UNC path: \\TAUKERENDER01\d\Huey\Project\taukeke\Temp\s015c043_BG.vrscene
Once everything is done, hit Enter and wait for Vray VFB window to appear to see your rendering in progress!
P/S: The whole reason to use Vray Standalone is that you can reduce the amount of memory footprint by not loading Maya and the working file. My usual project file weighs in average 14-20GB of RAM once it is loaded in Maya 2014 with the necessary plugins without texture in the viewport!
So with 32GB of RAM, my workstation simply ran out of physical RAM as a quick Vray test render means Vray will need to translate the Maya scene file to something Vray can understand and the 12-18GB of RAM that I have will be gobble up in minutes.
