General Purpose Usage Tweak
I’ve been using Mari for texture painting onto 3D model and it is great program once you familiarise with the UI.
For some reason, the default settings can be pretty conservative and this can lead to odd moments where the texture will appear pixelated on the viewport or the FPS start dropping due to complex shaders and model.
I’m using a Geforce GTX 780 3GB so this will be my baseline when explaining the settings. You can always knock it down lower than my recommended values to get a more responsive workflow.
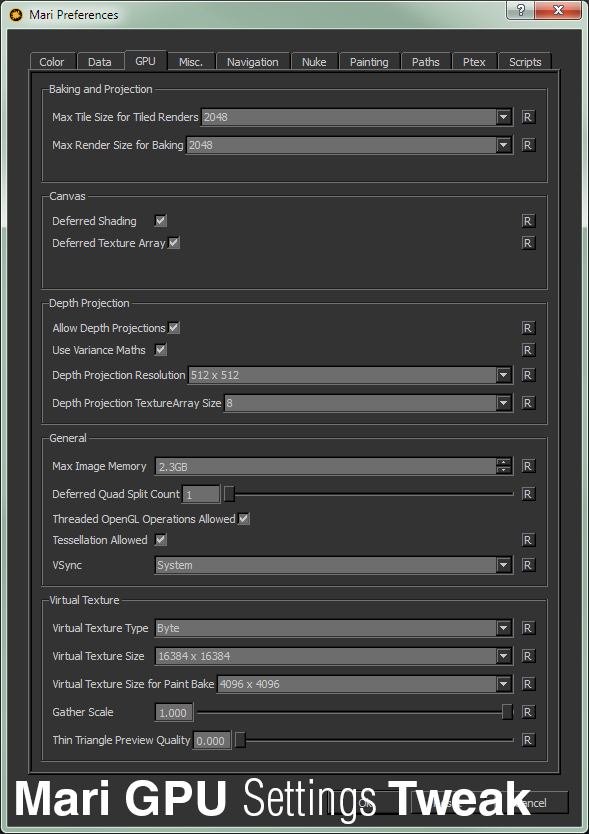
Baking and Projection
- Max Tile Size for Tiled Renders: The default value is 2048 which should be enough for most scenario. The maximum value is 8192 for those who need to work at insane resolution for high-end VFX work.
- Max Render Size for Baking: Pretty much same as the above.
Canvas
- Deferred Shading: Default is enabled. Disabling it utilise forward rendering instead of deferred. Most graphic card should benefit from it for faster interaction. I’m not sure how relevant this comparison, Unreal Engine 3 uses forward rendering while Unreal Engine 4 uses deferred rendering for the shading. The reason is deferred shading allows for more complex lighting in a single render pass unlike forward rendering where more geometries plus higher resolution will result in longer calculation. A good reading on forward vs deferred can be found here.
- Deferred Texture Array: Default is disabled. Well I enabled it since it claim to conserve resources on the graphic card when using deferred shading.
Depth Projection
- Allow Depth Projections: Default is disabled. Use for real-time shadows in the viewport. Sadly I never use it at all since the shadow quality is terribad to my liking.
- Use Variance Maths: Default is disabled. It is meant to control the variance maps maths for real-time shadows.
- Depth Projection Resolution: Default is 512×512. Controls the sharpness of the projected shadows. Higher more sharper looking shadows while lower means jaggies shadows.
- Depth Projection TextureArray Size: Default is 8. The number of layers used in OpenGL TextureArray used for buffer projections aka shadows. Sadly I never touch this feature but what I understand is that it higher value allows for higher number of projection of shadows.
General
- Max Image Memory: Default is usually half the max VRAM capacity of your graphic card. I suggest setting it to 70% of your total VRAM. More VRAM means more responsive Mari (although do note of other possible programs that uses VRAM too like 3D authoring software and game editor like Unreal Engine 4).
- Deferred Quad Split Count: Default is 1. It says when rendering full screen passes, it controls the grid size use for the passes. Ummm I got no idea what this does as I got no driver issues with Mari. You can try increasing it if you have drivers issue with Mari.
- Threaded OpenGL Operations Allowed: Default is enabled. Leave it enabled as you want to take advantage of the gazillion cores on the GPU for multi-threading operations.
- Tessellation Allowed: Default is enabled. I never use tessellation in my work but leave it enabled unless you work on 3D artwork that doesn’t requires tessellation.
- VSync: Default is System. Unless you LOVE SCREEN TEARING, leave it at System or ON.
Virtual Texture
- Virtual Texture Type: Default is Byte. You can choose between Byte, Half or Float and this affect the accuracy and amount of textures on the screen limited by your GPU VRAM. As usual Byte is the least accurate and smallest size while Float is the most precise with large size. I personally use Byte since I rarely work with HDR texturing so make sure to bump it up to at least Half if you dealing with lots of gradient tones to minimize the dithering from using Byte.
- Virtual Texture Size: Default is 8192×8192. My suggestion is to bump it up to the maximum value possible. Mine is 16384×16384 and it solves the pixelated texture on the viewport if you ever encounter it. So far no performance issue for me using the maximum value.
- Virtual Texture Size for Paint Bake: Default is 2048×2048. I use 4096×4096 as a safer value since there are times you work with 4K textures and need to project a large texture on the whole UV. Increase it appropriately depending on your project need.
- Gather Scale: Default is 1.000. Umm leave it as 1. Reducing it help to improve your navigation FPS but also reduce the texture quality (aka it become super pixelated) which can be a pain for me.
- Thin Triangle Preview Quality: Default is 0. Basically this control the mipmap texture on your model especially on thin geometry. Higher value allows for more accurate aka sharper texture to be displayed on the thin geometry. Think Anisotropic filtering in video game.
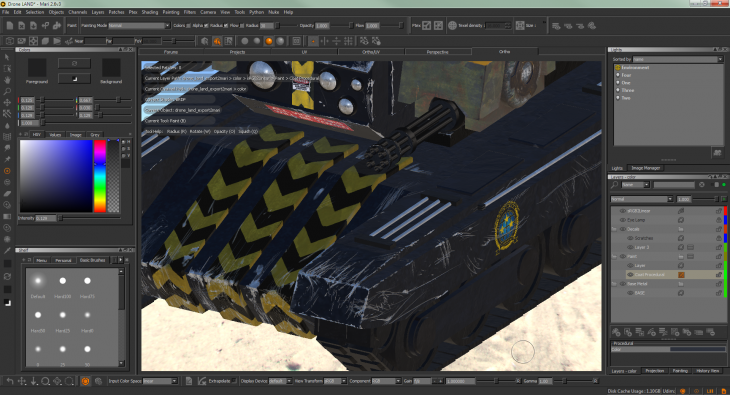
Comparison of low and high Virtual Texture Size respectively (click to view on new tab)

So… Mari GPU Recommendations?
To be honest, the amount of VRAM actually affects the overall performance in Mari compared to the GPU itself. As long you can get 3GB of VRAM, you should be good to go.
Preferably, anything from GTX Titan and GTX 780 or higher is a good start if you want a really responsive texturing workflow in Mari.
Since I have no experience with the Quadro series, I cannot suggest any model but stick to the latest and greatest to be on the safe side if budget is not a concern.
Same goes with AMD users. Stick with something like the R290 and higher.
Lastly, remember to keep your driver up to date! Although it hardly affects Mari since most driver updates improves game engine performance and rarely for productivity software.
