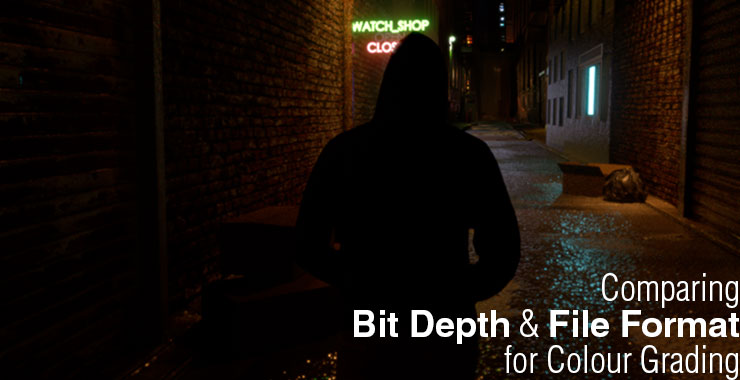
Biting some depth and formatting this post
Regardless if you managed to composite a damn good shot in either Nuke or After Effects (or any compositing software), it will be real sad if the desire output got ruined due to poor choice of the final delivery file format for colour grading.
This post will explore the common and differences between various file formats from my own experience with the indie projects that I got involved. Obviously the big players in the industry have their own requirements so I’ll tackle this issue from the perspective of a lowly compositor (that is me)!
Why colour (or color) grading?
There is a lengthy explanation over at Wikipedia on this topic or read on for my own version.
To keep it short, it is meant to give a unique look to the final product. Another term for colour grading is colour correction so as the name implies, there will be some form of colour correction involves to achieve the desire look that either the client or yourself wanted. As you composite shot by shot, there are times it will be hard to keep track of the overall look which is best deal in a NLE software like Premiere Pro, SpeedGrade, DaVinci Resolve and the upcoming Nuke Studio.
Obviously it is possible to do colour grading in Nuke and After Effects but both software are not friendly when you need to playback in realtime (and scrubbing too).
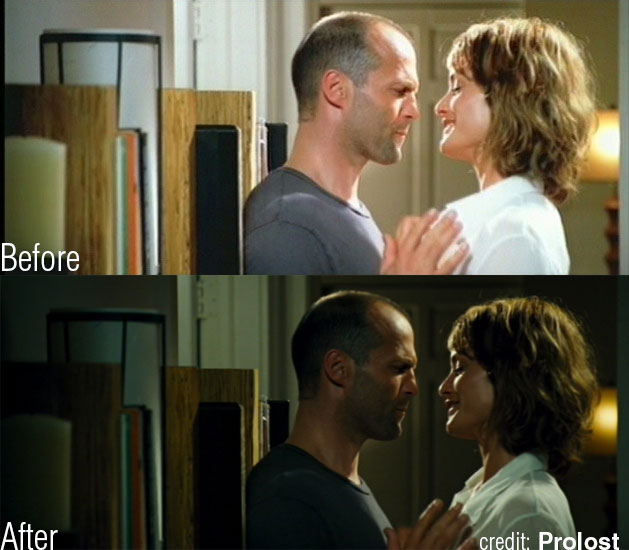
Also the following picture taken from Prolost show a great example of colour grading in action from Transporter 2:
Hence the inclusion of file format comparison in this article that will guide you in knowing the best format for your project.
So what is this voodoo magic bit depth and format?
Bit depth refers to the amount of data that it can stores (8, 16, 32 bit depth are commonly use) while the format refers to the method in storing the image (common format includes BMP, JPEG, GIF and PNG on the internet).
Since this post focus on image sequences generated from a compositing software, I deliberately left out video codec such as H.264 and Apple ProRes which is designed to compress a sequence of frames into one container for easier playback (and editing too depending on the choice of codec). Also choosing the wrong type of video codec can result in lossy information which will severely limit the colour grading process.
We know that lossy compression will result in noisy artifact. So I have chosen this four file format that is non-lossy by default: PNG, TGA, EXR and DPX. (well some of them have options to compress the image with lossy method but why would you do that?)
A quick look at bit depth
So bit depth in image format represent the amount of data it stores in a channel. For example, there is 4 channels (RGBA) in PNG with each channel being store at 8-bit depth (do not get confused with the total bit depth where someone could mentioned 24-bit (RGB only) or 32-bit (RGBA) PNG).
8-bit refers to 2^8 for a total of 256 value for any pixel in that channel.
While I’m really bad with maths (to be precise, Additional Mathematics), a dumb way of simplifying the whole explanation is to see the following chart:

Ok the above chart is an exaggeration and it doesn’t represent all the values correctly. Simply put higher bit depth means higher values which result in more information to work with.
A more thorough explanation can be found at this link: The Advantages of Working in 32-bit Float
Still larger values also means bigger file size so be warned.
Pinging Targeting Extrapolating Duplex?
PNG, TGA, EXR and DPX is the chosen file format for this comparison. Click on the file format to read more about it on Wikipedia.
Again I’m not an expert in explaining this stuff but here’s my take on the file formats in my personal working pipeline (larger studios have their own proven pipeline).
PNG
The great part about PNG is that it is lossless by default compared to JPEG which is already lossy by nature. Also unlike JPEG, is supports alpha channel too.
So PNG is great in preserving the original information but limited to 8-bit and 16-bit only. Depending on the scenes, you will unlikely face any issues when grading at extreme level.
Also take note that PNG can be both compressed or uncompressed. Still PNG takes longer to process in Nuke and Hiero compared to TGA, DPX and uncompressed EXR. I believe the same applies to After Effects but I never got the chance to test it properly.
TGA
The oldest format in this comparison, reading TGA files in Nuke, Hiero and After Effects is insanely fast. BUT it come with a drawback as TGA is limited to 8-bit (as far as I know when exporting out from Nuke).
At least it supports alpha channel which can be important if you need transparency in the final comping during colour grading.
TGA support RLE compression and from my test, I don’t see noticeable penalty in the decoding aka read speed (on my workstation anyway).
EXR
Developed by Industrial Light and Magic for use in the VFX pipeline, EXR can be really handy if you’re working a one man army style who also need to perform the colour grading.
EXR only supports 16-bit Half Float and 32-bit Float (8-bit is left out for obvious reasons). Unlike integer, float value can store much more information for the same number of bits. This make it a great format to work for colour grading with a catch. It is more CPU intensive to decode EXR format which means it is slower to work.
Also EXR support multi-channel which is great when you can store multiple mattes in a single file for use during the colour grading stage in both Nuke and After Effects (I’m unsure if dedicated colour grading software can read the extra channels in EXR).
From my testing, I find a regular RGBA EXR to be slightly slower than PNG or vice versa. Still the point is EXR and PNG is much slower than TGA which bring us to the last format in this comparison.
DPX
Commonly use in the industry, my first exposure to DPX is during my internship where the conformed footages is exported as DPX for compositing in both Shake and Nuke.
The first thing I noticed about DPX is how FAST both Shake and Nuke read it. This is great as working with thousand of DPX files will not slow you down if your workstation is properly configured.
There is a choice of 8-bit, 10-bit, 12-bit and 16-bit for DPX. This means only EXR is the only file format here that support 32-bit per channel.
The only drawback with DPX format is the large file it generates (I believe DPX does not utilise any form of compression) and the lack of alpha support.
32-bit is overkill while 16-bit retains the most value
Well 8-bit is still acceptable provided your overall scene is well lit and contain lots of bright colours (I’m referring to the saturation here).
Once you start pushing the grading to extreme level (especially noticeable by upping up the gamma), you can see the lesser bit-depth limitation in the following huge 1.83MB PNG picture (yes the original render is that DARK):

Notice how the 8-bit file suffer from dithering. Although for unknown reason, I can’t figure out the reason for DPX 10-bit odd wash out look.
The above example is graded to the extreme level and rare in 99.9% of colour grading session. Still it is a good way to verify if your converted files managed to survive with enough information for your final mastering.
Any recommendations?
Again, it is hard to give an absolute answer. Personally, I recommend sticking to EXR 16-bit if you have the storage space and speed as EXR is more flexible with the multichannel support especially for really tiny team who at most have one VFX artist who also double up as the colourist. This of course assuming they do the colour grading in Nuke or After Effects.
If you prefer to do the colour grading in softwares such as Premiere Pro, DPX 16-bit is the best bet as Premiere Pro does not support EXR unless you use ProEXR plugin.
Also be warned that if you do the colour grading in After Effects, make sure to set your project working space to 32-bit. Nuke automatically promote all images to 32-bit float (why would you want to work at 8-bit and 16-bit for VFX stuff?).
Enjoy and keep experimenting to find the best file format for your pipeline!

