Time to Conform to Normality
Another short Nuke Tips so without further ado let’s normalise/normalize!

If you output a Pz (depth) image plane from Houdini’s Mantra and read it in Nuke, you’ll see it as a solid flat colour and wonder why it doesn’t match the view in the Render tab or Mplay in Houdini.
What happened is Houdini remap the Pz data by normalising the min/max value to a viewable range for the artist.
So here’s what we can do to make it viewable (and usable for various compositing tasks) in Nuke.
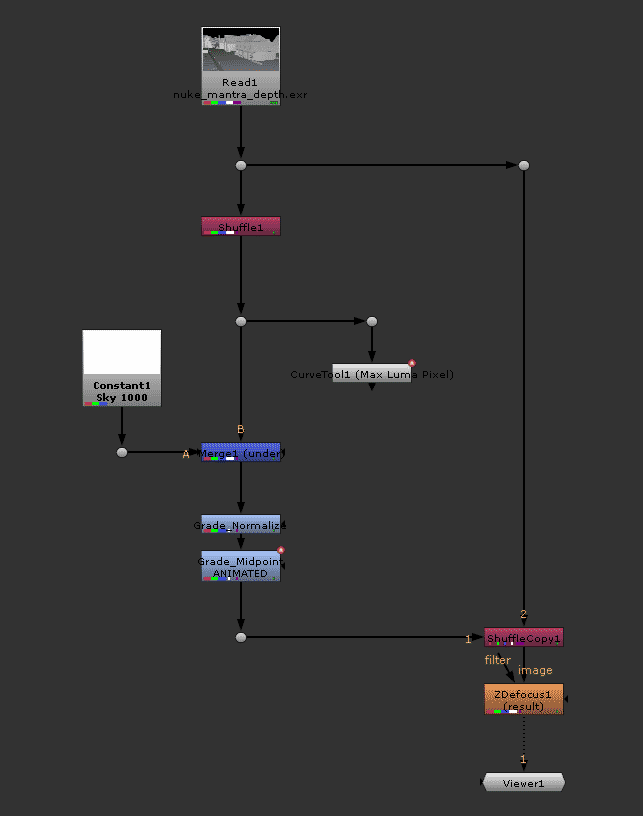
- Shuffle the depth channel to RGB and alpha to… Alpha. (this step can be skipped if you prefer to manipulate the depth channel directly)
- Optional but you can use the CurveTool node and use the Max Luma Pixel operator to find the brightest pixel in the depth channel.
- Use Grade node to remap the black and white point. Typically you can leave the blackpoint at 0 and set the whitepoint to the brightest pixel.
- Another optional step but in case there is no valid sky dome geometry to represent the sky depth, you can fake it by using a Constant node with a value way higher than the brightest pixel and merge it using Under if you been following the above steps.
- To adjust the midpoint of the depth, tweak the Gamma value.
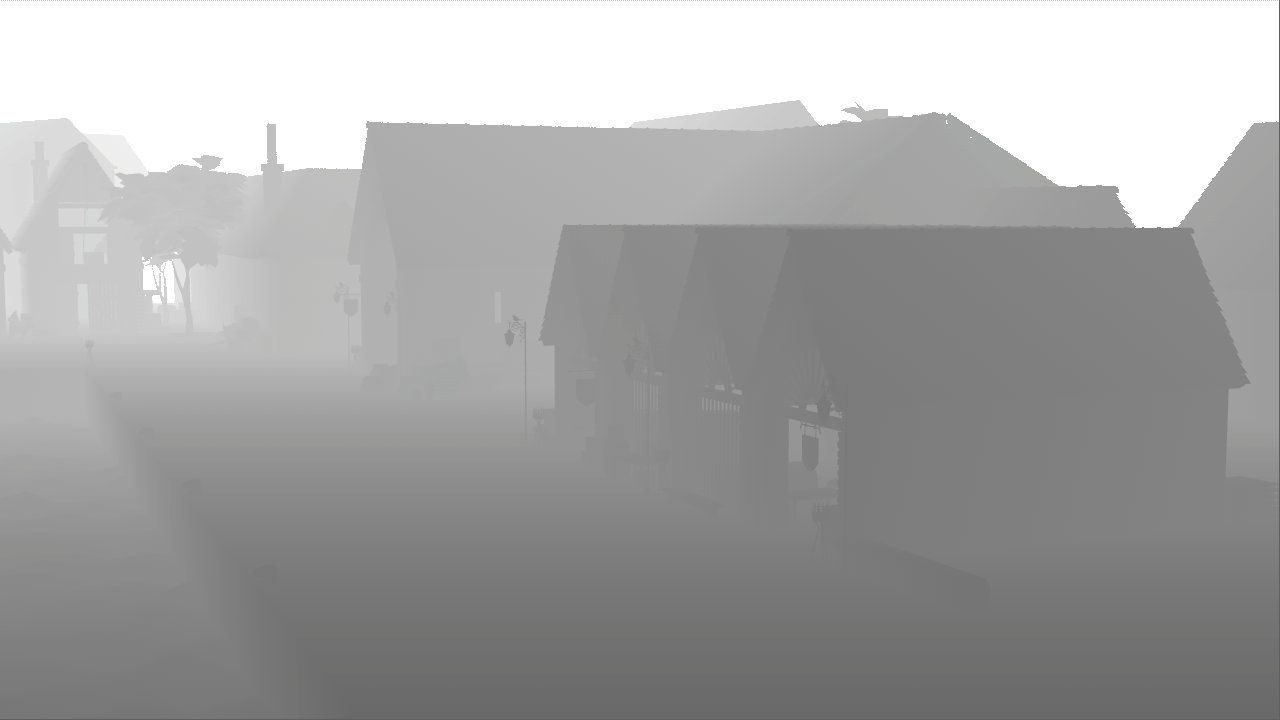
This is the end result:
Here’s the node graph setup for your reference:
Why Normalize Depth Pass?
Seeing a solid colour in the viewer is not exactly practical!
This tutorial is more for Mantra way of handling the depth pass where it renders depth using the distance from the camera.
Pixels that are nearer to the camera are closer to zero and pixels that are further from the camera are represented by the distance from the camera.
Imagine you have a building geometry that are 100 units away from the camera, the pixel value will be approximately 100.
Traditionally most renderer will offer options to set the near and far clip value to render the depth pass but this are destructive as we “bake” the possible depth range to fit into the final depth render. Unless you render and export the depth pass at least in 16-bit Half Float or better 32-bit Float (which can be overkill unless you need the highest accuracy during compositing).
Further Reading/Viewing
Learn How to Render and composite Z-Depth in Houdini: https://www.sidefx.com/tutorials/learn-how-to-render-and-composite-z-depth-in-houdini
Houdini Rendering to Z-depth with Mantra (Pz) (Japanese): http://yoong-cut-and.blogspot.com/2015/02/houdini-rendering-to-z-depth-with.html
Houdini – ZDepth Passes (Japanese): http://www.technical-artist.net/?p=92
Tutorial – Demystifying Camera Depth Passes in Maya Mental Ray: https://vimeo.com/113997080
The right way to render a depth pass: http://forums.cgsociety.org/showthread.php?t=901605
VRayZDepth using 3ds Max: https://docs.chaosgroup.com/display/VRAY3MAX/Z-Depth+%7C+VRayZDepth
VRayZDepth using Maya: https://docs.chaosgroup.com/display/VRAY3MAYA/Z-Depth+%7C+vrayRE_Z_depth

