Enlightening LightWrap in Nuke
One of the issues when trying to integrate different elements from several sources is that the lighting will break the believability of the scene.
This is especially true when you are working with shot where the background (BG) is brighter than the foreground (FG) elements and if we are not careful, the FG elements feel out of place as it doesn’t sit properly in the environment.
Before I proceed to the functionality of the node, let me explain what the heck is light wrap?
(If you are looking for Light Wrap tutorials in After Effects, you can read more about it at PremiumBeat since this post focus solely on Nuke)
Wrapping burritos/popiah I mean FG with light from the BG
If you ever seen a burritos or popiah getting wrap, you can see the similarity in that we are trying to wrap “light” onto the FG elements.

^Here is the lightwrap set to output Wrap Only and dial to the max to show the effect clearly.
Think of light bouncing in a scene from the BG lighting. The FG elements will receive the spill light from the BG especially a strong light such as the sun,
When properly done, it will increase the realism of your shot but let’s say if you screw it up awesomely by cranking up the values, it gives the appearance of “soft” and “fuzzy” look to the FG elements which look out of place.
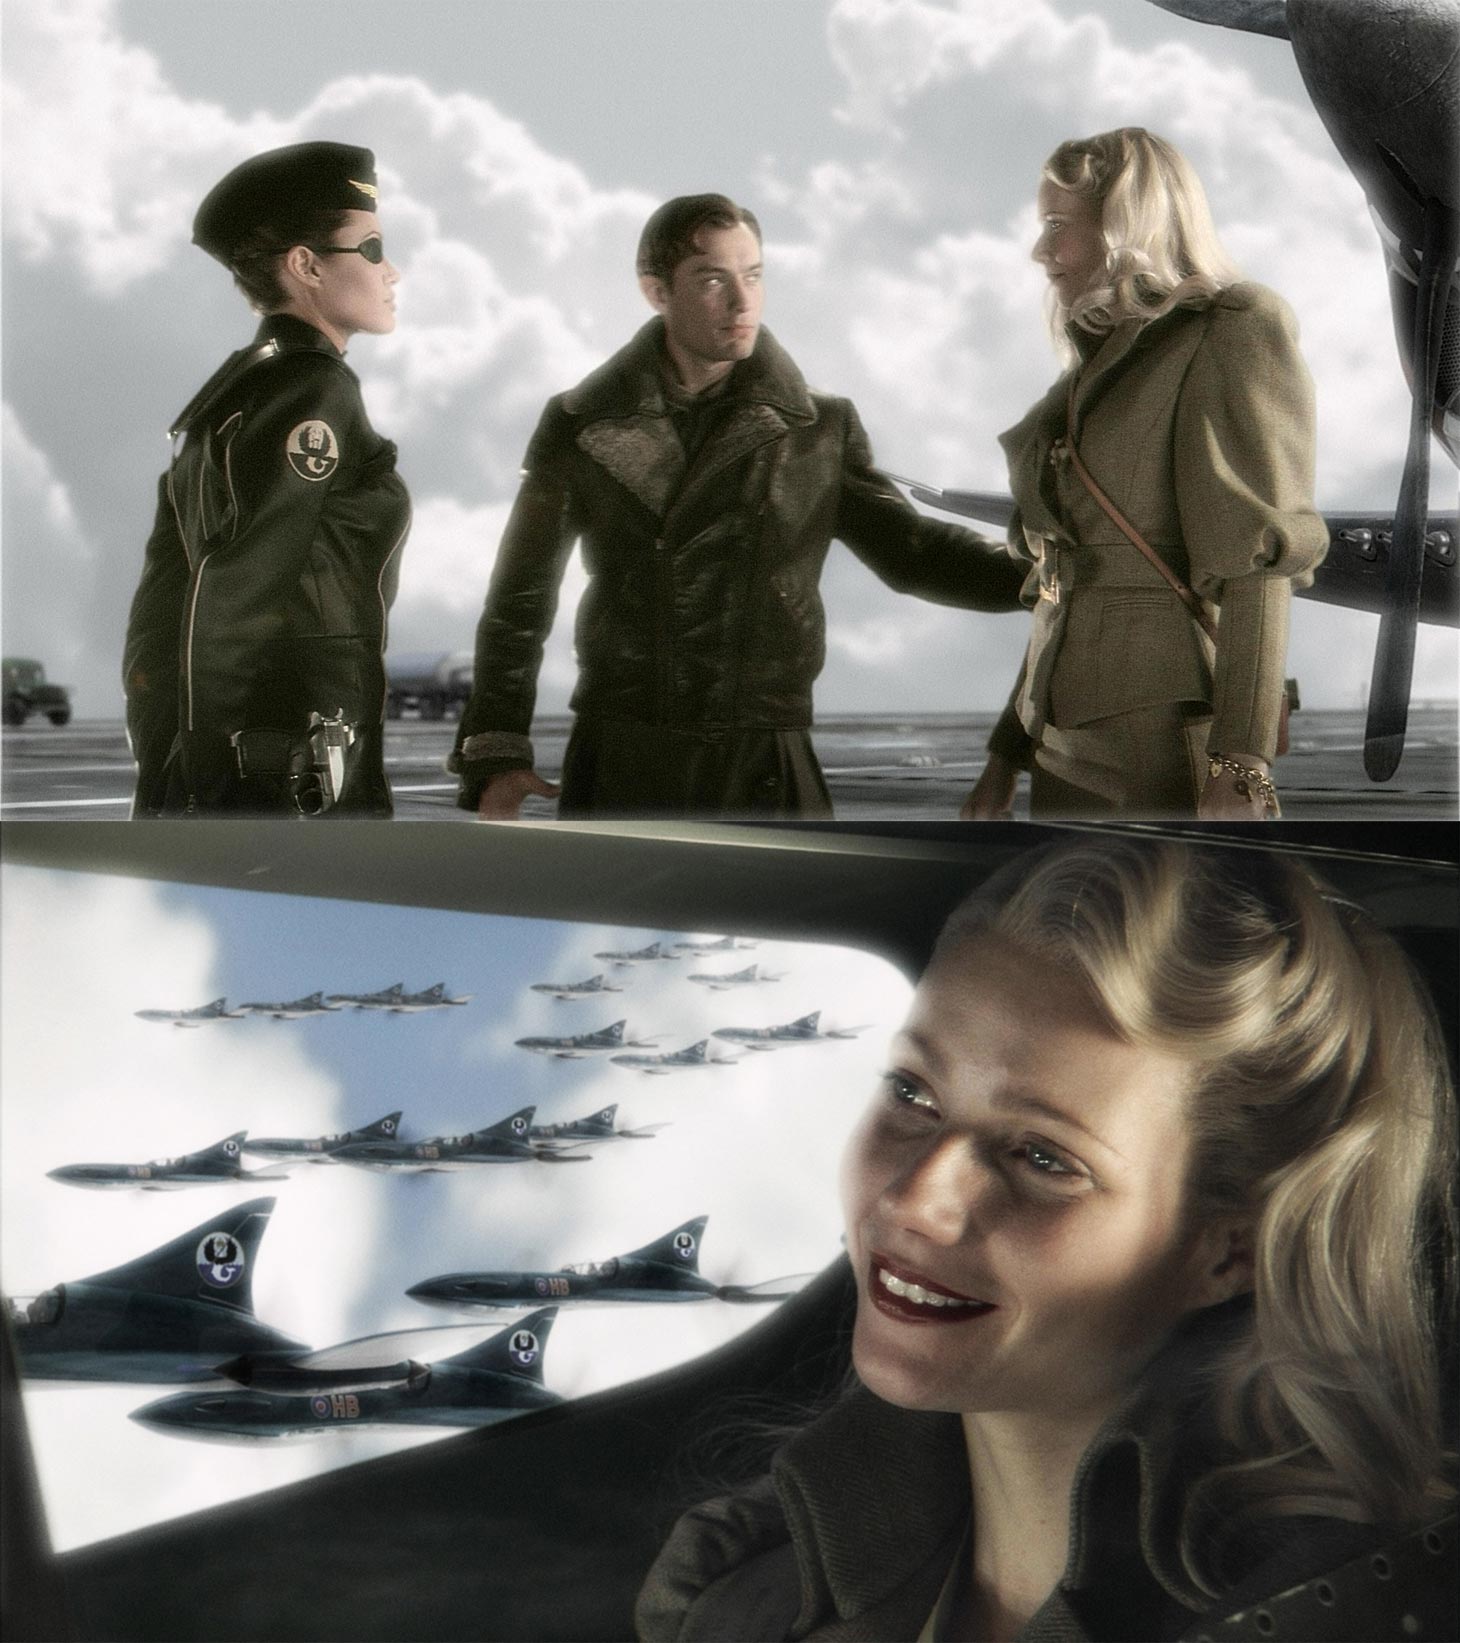
^For example, over exaggeration of light wrap can be seen in Sky Captain and the World of Tomorrow (click here for the trailer at Youtube).
The process is usually done at the near final stage of the compositing but again it depends on the situation.
Breaking down Light Wrapping
Basically light wrapping is like the Inner Glow effects seen in Photoshop with a twist, it samples the background pixel brightness and appropriately apply the glow to the FG elements.
Still you can override the default behaviour and create a similar result as seen in Photoshop.
Remember this technique can be apply to full CGI shot and not necessarily with live-action shot. It is yet another tool at your disposal to enhance the final shot.
Practical use of LightWrap
- Use to wrap FG elements with the BG lighting. Obviously.
- Abuse it to blend the edge of the FG elements with the BG plate in situation where there the lighting of the BG is not intense and the edges of the FG elements suffer from light bleeding.
- Inner glow or inner drop shadow! (If you miss this feature from Photoshop and After Effects since Nuke lack a default node dedicated for it).
The LightWrap Interface in Nuke
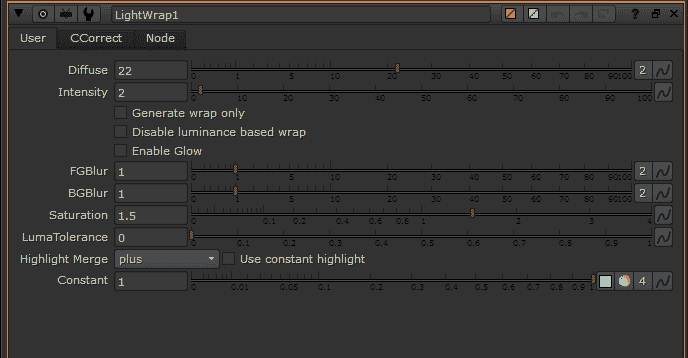
So there is two main tabs in the LightWrap node that is the User tab which is where you tweak the overall light wrap look while the CCorrect tab is responsible for colour correction (although I never use it as I prefer to use a separate node to do the colour correction).
- Diffuse: This determine the size of the light wrap in pixels. So adjust appropriately depending on the size of the project (for example, the settings that works great for 1080p will look smaller on 4K size).
- Intensity: Affect the strength of the light wrap (think opacity).
- Generate wrap only: Omit the FG elements pixels and output the light wrap only.
- Disable luminance based wrap: By default, LightWrap will try to generate light wrap based on the brightness of the pixels so brighter area means bigger light wrap effect. So by disabling luminance based wrap, LightWrap will output a uniform result regardless of the brightness of the pixels.
- Enable Glow: Self explanatory. Again you can generate glow with a separate Glow node for finer control.
- FGBlur: Blur the matte/alpha of the FG element. So stronger value means more BG pixels affecting the light wrap for the FG elements.
- BGBlur: Blur the BG before LightWrap use it to calculate the light wrap effect for the FG elements.
- Saturation: Controls the light wrap saturation. You can input higher than 4 which is the max limit of the slider if you need a more saturated effect (useful for really colourful backlighting).
- LumaTolerance: Determine the threshold value aka the pixel brightness where LightWrap will only take effect. For example, a value of 0.2 means any pixels luminance below 0.2 will be omitted from the final light wrap effect.
- Highlight Merge: The merge operation for the light wrap onto the FG elements. The default value is plus.
- Use constant highlight: When enabled, LightWrap ignore the BG and use the the colour of choice that you set in Constant.
- Constant: Choose the colour of your choice for the light wrap. Only works when you have “use constant highlight” enabled.
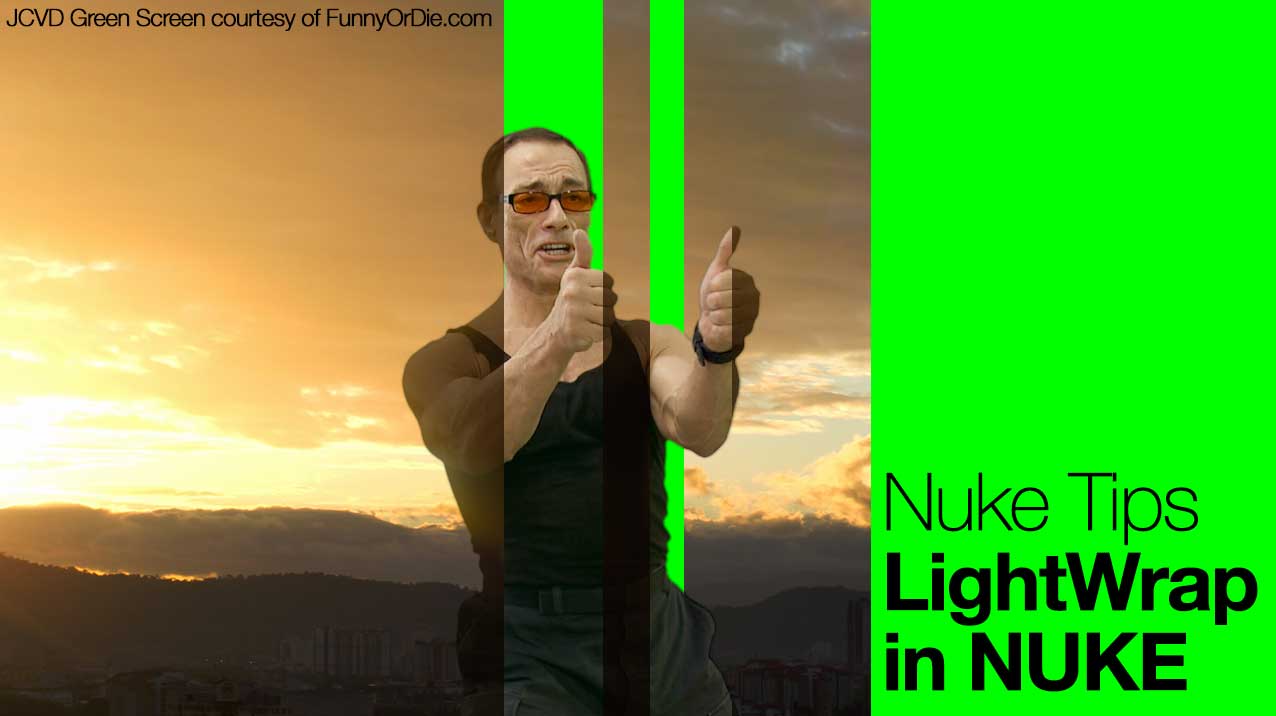
Quick Demo of LightWrap
I created this quick and dirty demo to demonstrate the LightWrap effect. Make sure to view fullscreen and at 720p (the max resolution since the JCVD greenscreen by FunnyOrDie.com is 720p).
The LightWrap effect is quite subtle and I add other effects like the godray and lens flare to enhance the final look.
The background is a picture that I taken with my Canon 550D and I animate the sky with the transform node in Nuke.

